I love the weather! It is so spring(ish) although it is not even April yet. There is something in spring that makes me want to do stuff. I think it is the sunshine. At least it is the inspiration (or reminder) to clean my room from floor to ceiling and wall to wall, which I have been gradually been doing in the past week, although I should be reading for my mocks (and my finals). But I just hate how all the dust can be seen in the spring sunlight.
Anyway, cleaning has not been the only procrastination this week for me, but I also have been thinking about possible DIY things and other crafts. I even painted for the first time in a loooong long time (and by long, I don't mean weeks, but more like months or even years). Got an order from my mom, since she needed something new to her office to replace the old and broken poster.
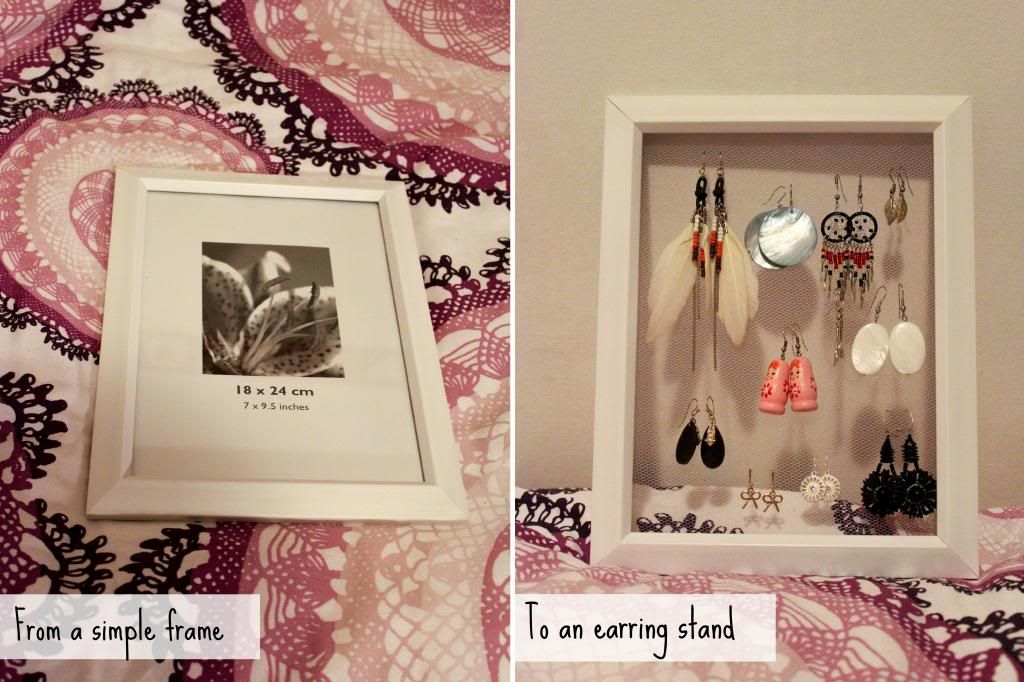
But the painting is not what I am introducing today, but my newest DIY is. I have been thinking about doing some kind of a jewelry stand for a long time, but just never really got to it. And then I found the perfect jewelry stand from Ajno. It had only one flaw. I did not have a place for my earrings, so they have been hanging in this funny looking green man my brother has made in school. Until now!
I finally got a perfect and ubersimple idea for an earring stand, which reguired minimum amount of things I did not have already.
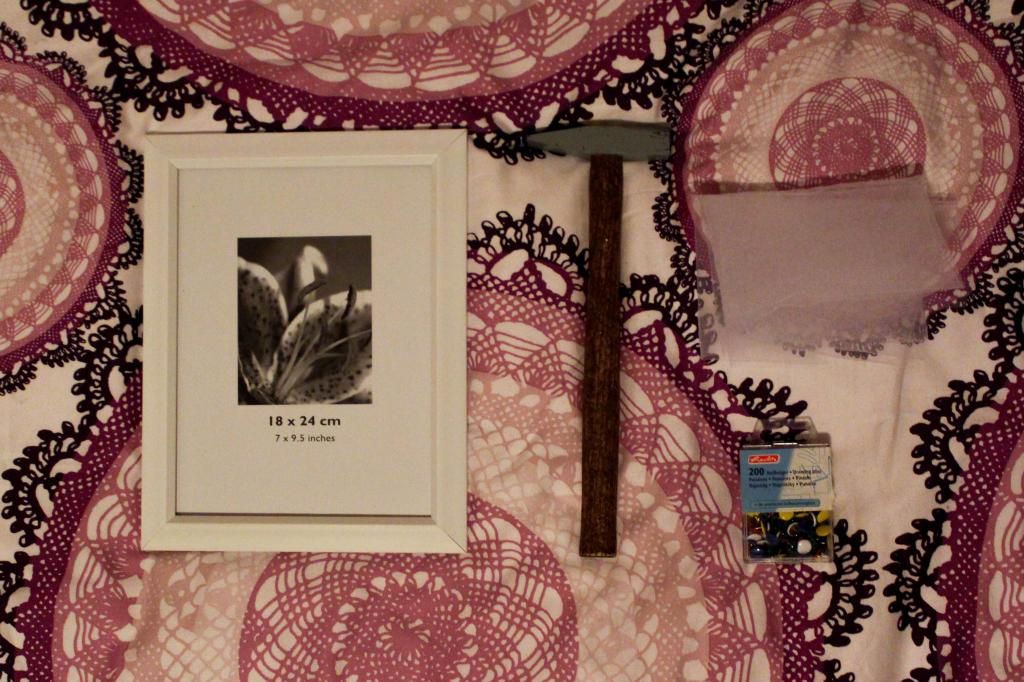
1. Frame - which I found at Suomalainen Kirjakauppa for only 3 euros!
I used frame size 18cm x 24 cm as you can see from the picture, since in reality I don't have that many hanging earrings.
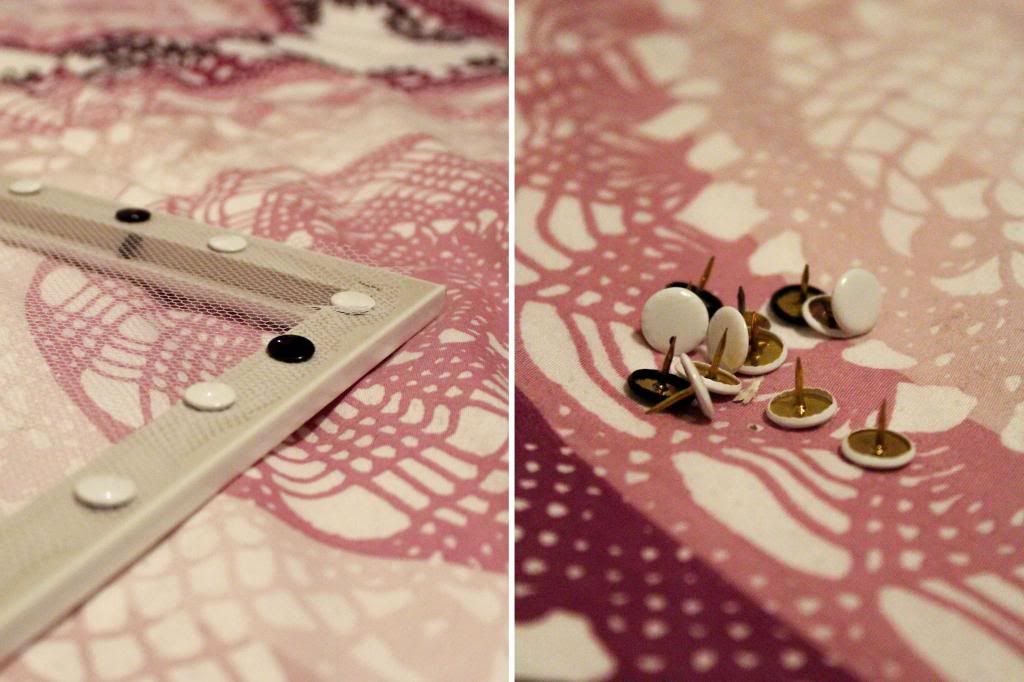
2. Drawing pins - which we also have a lot for some reason
3. Hammer - to nail the pins to the frame, if the frame is little too hard
4. Tulle fabric - which we also had left over from my grandma's move
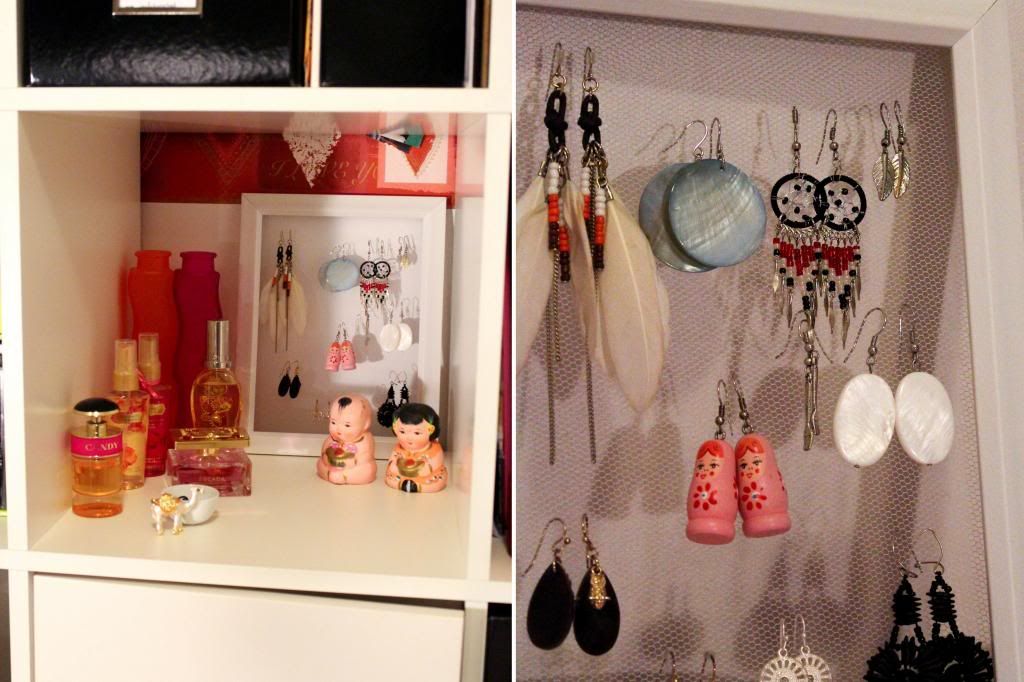
I recommend using tulle that has big "holes" as it appeared to be lot more easier to hang earrings to it.
I got lucky and my frame was so soft that I did not need to use the hammer at all, but if somebody wants to try this and has to hammer, just remember to put something under the frame to protect it! And also check that the pins are strong enought. You can also do a hook on the back, of course, if you are planning on hanging the frame on the wall. The original will probably get lost as you take of the original back of the frame.
I chose not the hang the frame, at least in this room, since I don't see any place it would fit. Hence the frame took the place of the old green man in my bookshelf. I'm really happy on how it worked out.
The only problem is the left-over glass, anyone have any suggestions on where to use it? :)
The only problem is the left-over glass, anyone have any suggestions on where to use it? :)


Aivan ihana postaus, tykkäsin todella! Pitää tehäkkin tollanen :3 toivottavasti et loukkaannu suomenkielisestä kommentista, en jaksa ennen aamuseitsämää vääntää englantia. Ja hei tää on muuten hirmu kiva blogi muutenkin, ulkoasu on upee, kuvat tosi isoja ja hyvälaatusia ja postausaiheet mielenkiintosia jopa mun mielestä c: täytyykin selailla postauksia enemmänkin..
ReplyDeletehttp://cowswings.blogspot.fi/
Ah mitenkä ihana kommentti kiitoksia paljon!
DeleteEn loukkaannu suomesta ollenkaa, äidinkielihän se on! :)